Week 3: Computer-Controlled Cutting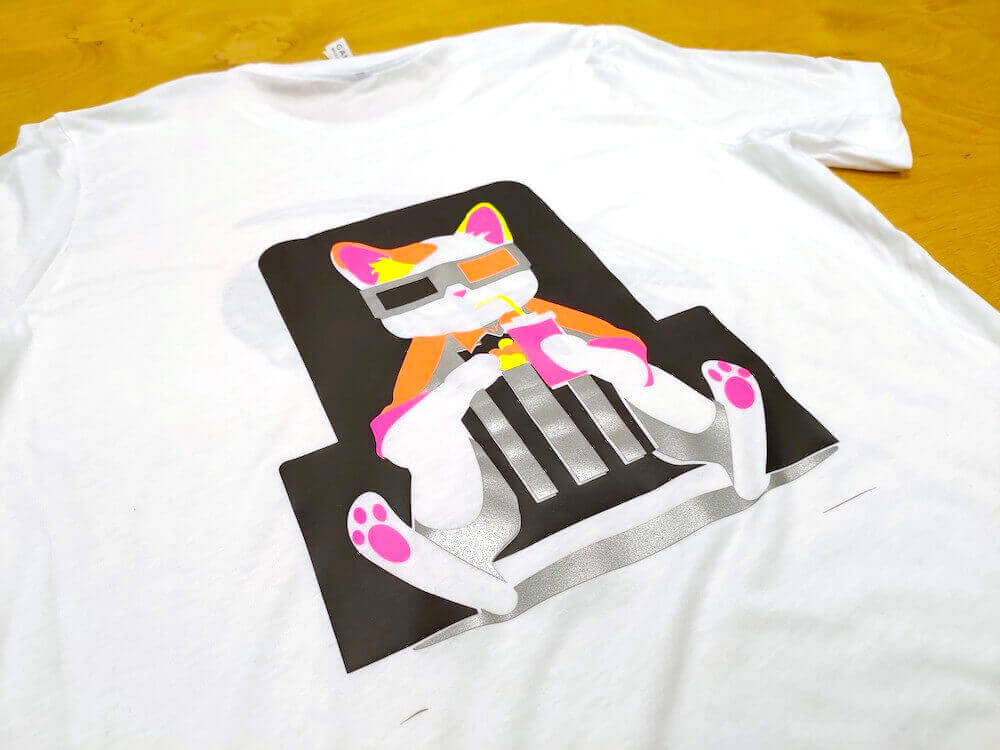
#OpenSCAD #Illustrator #Laser Cutting #Vinyl Cutting
Assignments: (Group) 1. Characterise your laser cutter focus, power, speed, rate, kerf, and joint clearance. (Individual) 2. Design, laser cut, and document a parametric press-fit construction kit, which can be assembled in multiple ways. Account for the laser cutter kerf. 3. For extra credit include elements that aren't flat.
Published on: Feb 12, 2020Last updated on: Jan 12, 2021
Individual Assignment: Vinyl Cutting Project

Materials
| # | Name |
|---|---|
| 1 | Vinyl Cutter: Roland GX-24 (Manual) |
| 2 | Heat Press Machine |
| 3 | T-Shirt Heat Transfer Stickers |
Setup: Vector Image Adjustment in Illustrator
I used my vector painting image as the material for vinyl cutting.


Before cutting, I did some adjustment so that the path of the blade could work as my expectation. In order to simplify the vectors of my image, I chose which layer is going to be trimmed with another one. I did this by clicking the Trim option of the Pathfinders dialogue box in Illustrator.


After this, I refilled the color of different parts and grouped parts with the same color.


Fabrication: Roland GX-24 Vinyl Cutter
The finished file was then sent to the machine wainting for cutting. First, I measured the width of the inserted material sheet by selecting the EDGE mode.


Then, since I was going to cut the same image 6 times with 6 colors, I chose Output Selected Lines option, selected the first mirrored layer and clicked Output the Paths.


After the cutting was done, I pressed MENU then ENTER button to exit the cutting mode.


I kept the parts I would like to transfer to a T-shirt.


T-Shirt Heat Transfer
Finally, we used a heat press machine for transfering the cutting image to a T-shirt. The machine should be heated up to 165℃ to make sure it can transfer the pattern successfully. Since there are total 6 layers I would like to transfer to the T-shirt, I pressed each layer (except the last yellow layer) and waited for 3 seconds then changed to the next one (normally 12 seconds for total 1 layer).


I was lucky to find a reflecting sheet in a trash box, which results in a cool T-shirt with a fancy cat.

Group Assignment: Characterize Our Laser Cutter
Link to Documentation Page
Materials
| # | Name | Type | (Cutting) Area | Height | Other |
|---|---|---|---|---|---|
| 1 | Laser Cutter: EPILOG Legend 36EXT (Manual) | 60W CO2 | 914 x 610mm | 305mm |
|
| 2 | Laser Cutting Sheets | MDF | 60 x 60mm | 4mm |
Individual Assignment: Laser Cutting Project 1 - Parametric Press-Fit Kit

Material Sheets + Cutting Parameters
| # | Name | Area | Thickness | Speed | Power | Frequency |
|---|---|---|---|---|---|---|
| 1 | MDF | 300 x 200mm | 6mm | 8% | 75% | 500Hz |
Design Tool: OpenSCAD
I defined 3 modules (base_shape(), sheet_kerf() and chamfer_kerf()) and differenced them to form the final combination. I can transform some features by simply changing the values of laser_kerf_width, sheet_thickness, sheet_kerf_length, etc.

It is convenient to use a for loop function in OpenSCAD to generate multiple units at once.

Cutting Tool: Illustrator
It is important to make sure that the stroke width of all the cutting vectors is set to 0.001 with #000000 black color.

Then I opened the Print dialogue box and did the following settings step by step.


Here is a table for the setting of Fablab's laser cutter according to the thickness and the material of a cutting sheet.

Below is the documentation of the laser cutting process:

End Result


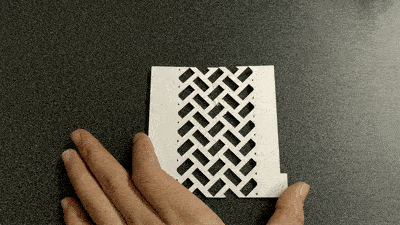
Individual Assignment: Laser Cutting Project 2 - Living Hindge

Material Sheets + Cutting Parameters
| # | Name | Area | Thickness | Speed | Power | Frequency |
|---|---|---|---|---|---|---|
| 1 | Paper | 150 x 150mm | 0.2mm | 90% | 55% | 500Hz |
Design Tool: OpenSCAD
Since it is normal to use linear pattern to build a living hinge, I was intereseted in exploring more possibilities to construct other kinds of living hinges. I found some discussion about how to build a living hinge from the OpenSCAD forum. I then used 4 modules as a reference and experimented them by transforming them and changing their parameters.

End Result
The sheet with different patterns has distinct flexibility.
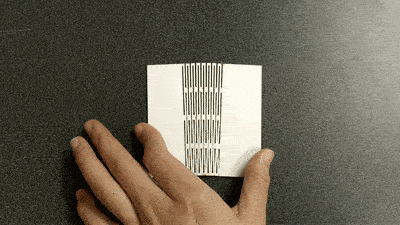
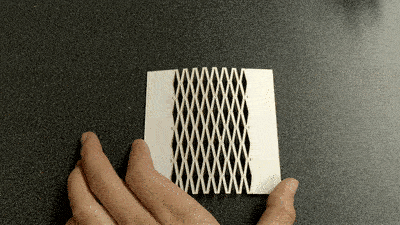
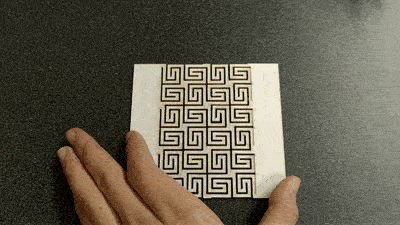
Below is the documentation of the laser cutting process:
